Article by: Tom George, WordPress Blog Expert. Also Chief Editor of findbestwebhosting.com
So let me guess, you know how to cook andstep 1 your recipes are to die for that, people have been telling you to start a blog. Why don’t you start a blog then? What is keeping you from creating one?
A blog is not as complicated as it sounds. In fact, you don’t need any technical know-how to start one.
However, if you want to start a successful blog, it’s anything more than that – but with time, effort, and experience you’ll get to it.
Why Follow this guide?
Chances are that you already googled and found similar articles.
So why follow this guide? Here’s why…
- Easy to follow steps.
- Every step includes screenshots with sufficient details.
- Guide written for a food blogger wannabe, who has minimal technical skills.
- Once you complete basic level and get comfortable with your blog, then you go for advanced level. You complete basic steps first to start the blog. Then goto advanced level.
- Written by a WordPress Blog Expert, who has helped food bloggers create successful blogs
About this tutorial
This guide gives you all the steps you need to setup a food or recipe blog. Each step includes details and screenshots so that you feel confident during the entire process. This is a DIY guide. But be confident. You can do it and many good bloggers have already achieved it.
1) Find a memorable name for your blog first and then buy a matching domain name.
It is highly recommeded that Domain names(for example myrecipeblog.com) be short and memorable. Details below.
2)Signup for a reliable web host.
You need a reliable web host who will be hosting your recipe blog.
Your web host will make sure your readers can access your blog via Internet. We will recommend the best web host who can also install your blog for free.
3) Setup WordPress, the best blog software
You might have heard about WordPress already. It is the most popular blogging software and nearly 25% of Internet’s websites are created using WordPress. Good news is, the web host we recommend installs wordpress for free. You just need to do some basic steps to setup blog title and tagline
4) Install WordPress themes and plugins.
We will add a nice theme to your blog that makes sure it looks great and readers feel comfortable navigating your blog. This step also explains how to add your recipes and how to become a successful blogger.
So lets begin….
Step 1: Choose memorable and short Domain name
This is the fun part as you’ll get to name your blog.
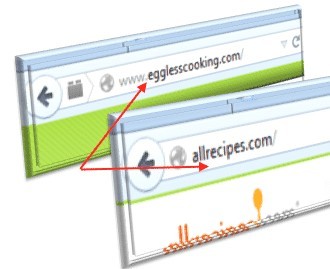
A Domain name is how people will be able to reach your blog. It is your blog’s unique website address. Examples: google.com, simplyrecipes.com
To get a domain name, the usual route is that: you will have to go to a domain registrar like godaddy.com, pay a registration fee and register that name.
But many reliable hosting companies are offering FREE domain registration so that you signup with them. When you sign up for hosting, you get a free domain name. Plus you have the advantage of setting up everything in one place.
Note: Even if you already purchased your domain name elsewhere, it is still okay. You can follow this guide.
E.g. Webhosting providers like WebHostingHub provide a free domain name with each hosting purchase.
In this guide, we will show you, how to setup a food blog using WebHostingHub, a reliable webhost, who offers free domain name for new customers.
Tips on Choosing a Good Domain Name
With all the food blogs out there, your first domain name that comes to your mind might already have been taken. So here are some tips in naming your blog:
Choose a name that is memorable and easy to pronounce. Brainstorm as many ideas as possible. Once you have thought of a few possible names, check to see if that domain name is available. Make sure the domain name meets the following naming conventions:
- No numbers. Unless the number is really important, it will be harder for people to remember your domain name.
- Try to make it only to 2 words. It will be easier to remember than having three or more words in a domain name.
- If you can invent a word, the better. What does Facebook, Pinterest, and Twitter have in common? They have a short unique name that people won’t be able to forget.
- Remember that once you registered a name, you cannot change it. So make it count.
Since this is a food blog, words like recipe, bakes, baker, foodie, savory, tasty, diet etc would make good choice as part of your domain name. Examples: laurabakes.com, foodiesheaven.com… Hey, I am just throwing ideas here.. I am sure you can come up with creative udeas.
Step2: Sign up for Reliable Web Hosting (includes your free domain)
Now that you have an idea about your domain name, its time for your blog to go online. Now what we will do is, Sign up with WebHostingHub and then setup your domain name(free).
Note: WebHostingHub is a reliable webhost with excellent customer support and has hosted many successful blogs. Users have given great reviews about this webhost. So you can confidently choose WebHostingHub for web hosting.
The instructions to complete the order process is given below.
Click here to signup for webhosting hub hosting (Opens a new window)
Then come back to this page for further instructions.
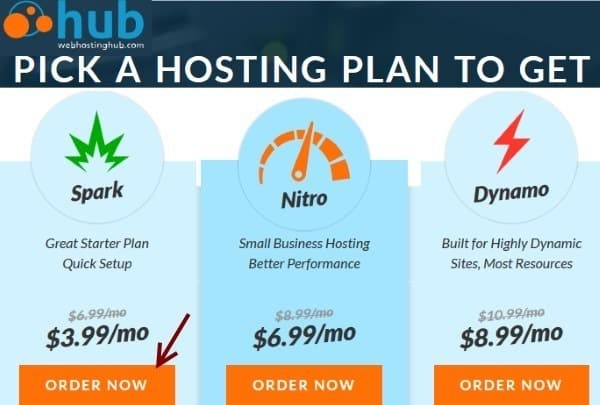
From the Web Hosting Hub homepage, click on order now button
Select your package. Here you will see 3 different hosting account options. For a food blog, Spark plan is enough. Click the “Get Started” button underneath Spark and you’ll be taken to a domain signup page.
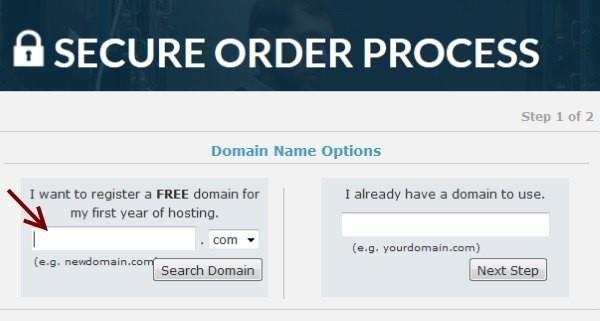
Register your domain name. Type your domain name in the Free Domain box on the left.
Note: If you already have a domain registered elsewhere then you can enter this in the box labeled “I already have a domain” and click the “Next Step” button. Now skip next section and goto Account information Page details section for further instructions.
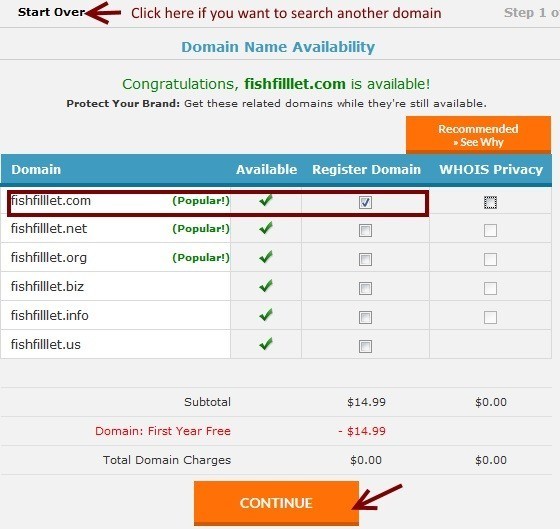
Here you can see more domain options. Domain privacy is something that webmasters use to hide their contact data from public.privacy isn’t really needed but it’s good idea to protect your identity. Select your domain and click continue button.
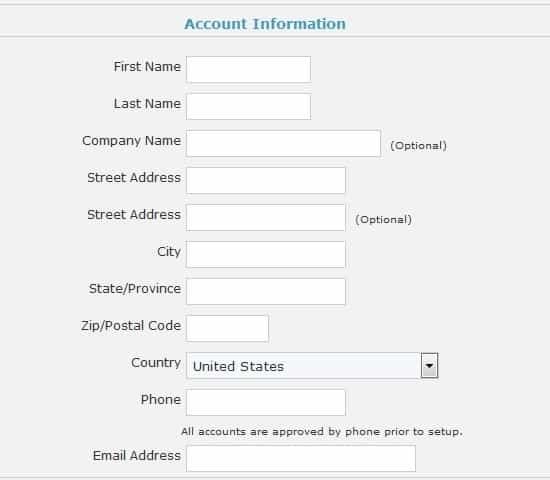
Account Information Page Details: In the next page, fill your account information. This is where you’ll add contact information for your account along with billing information.
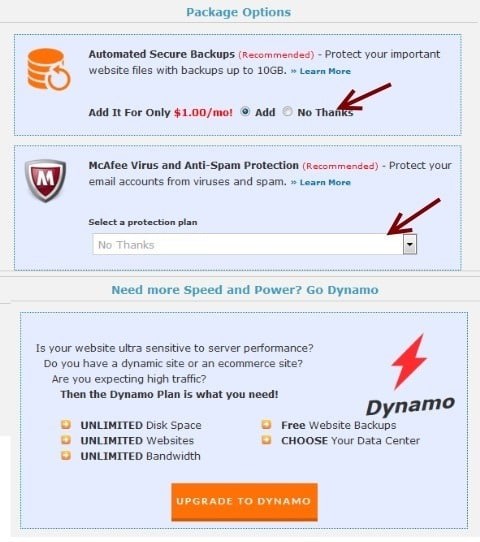
Scroll down to see Package Options. Here you see see options like Automated Secure Backups,
McAfee Virus and Anti-Spam Protection and upgrade to Dynamo server options. You can leave this part and select “No Thanks”.
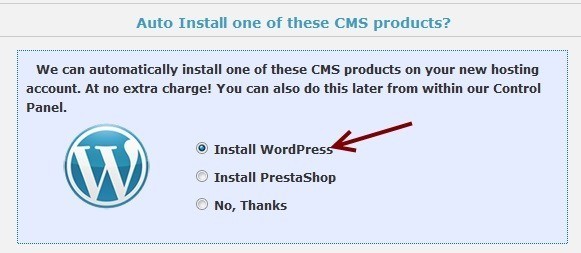
Scroll down to WordPress Auto Install WordPress is a blogging software that simplifies the complications of designing your site. It is very easy to use and is also one of the most popular Content Management Systems.
“WordPress is the most popular blogging system in use on the Web at more than 60 million websites.” WikePedia.org
That said, let us select the option automatic WordPress install. It should be setup within minutes.
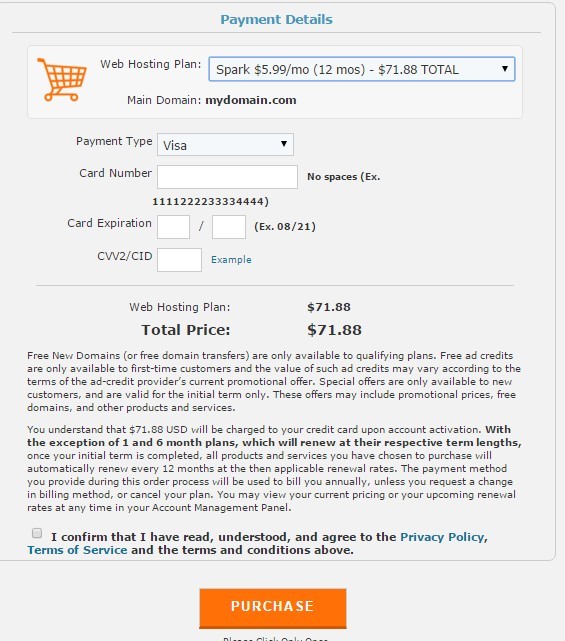
Scroll down to Payment Details. Here you can select a payment cycle. Enter your credit card details. Read and agree their terms and conditions and click on Purchase button.
You will receive a welcome email: Once you’ve successfully signed up for a new account, you should get a confirmation email from Web Hosting Hub.
This email will include Instructions to login into your wordpress blog Adminstration DashBoard:
If you purchased a new domain, please allow up to 48 hours for propagation to complete before viewing your site.
Even if you did not purchase a new domain through webhostinghub, you still need to follow steps below:
Step3: Setup your wordpress blog
Now, let us set up your blog using a temporary website address.
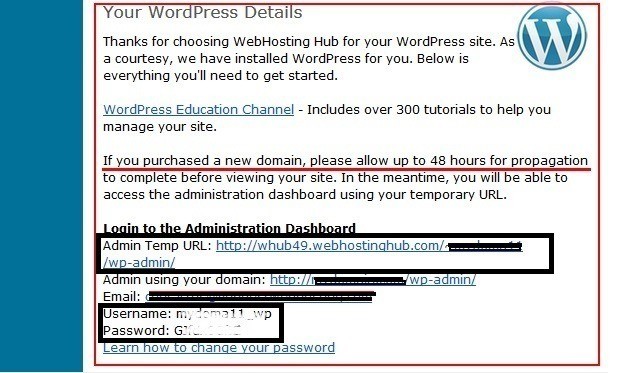
In your welcome email, if you scroll down you can see “Your wordpress Details” as shown below.
Click on the link next to “Admin Temp URL”. It will also have your username and password.
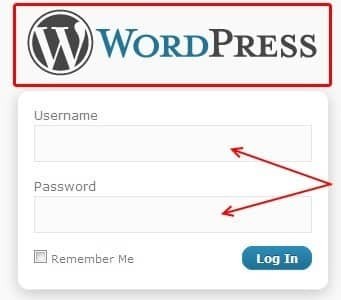
This will open up your WordPress blog Admin Login area. Use the username and password to login into WordPress Administration Dashboard.
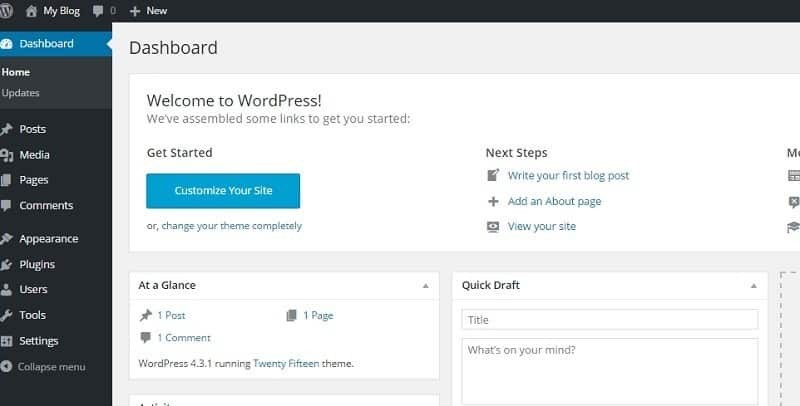
The first thing you see when you login to WordPress, is the Dashboard.Right area gives you a general overview of your website and left area displays many useful quick links for performing common tasks.
Now, let us make some basic changes.
- Change Title and Tagline
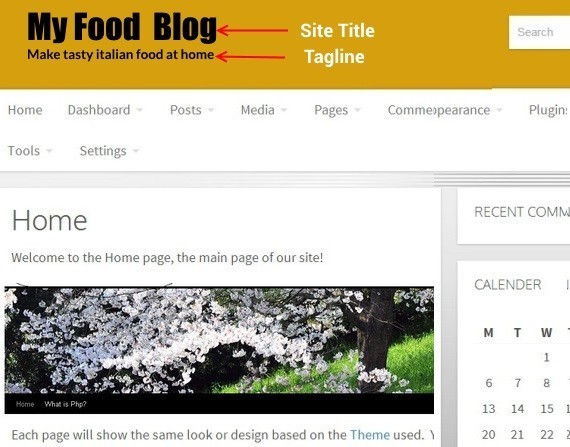
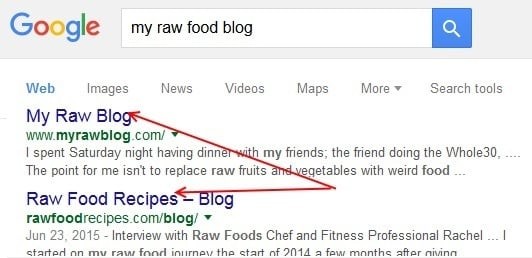
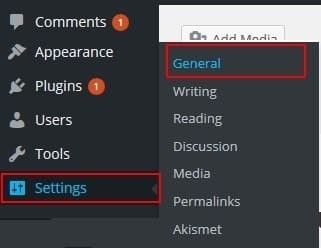
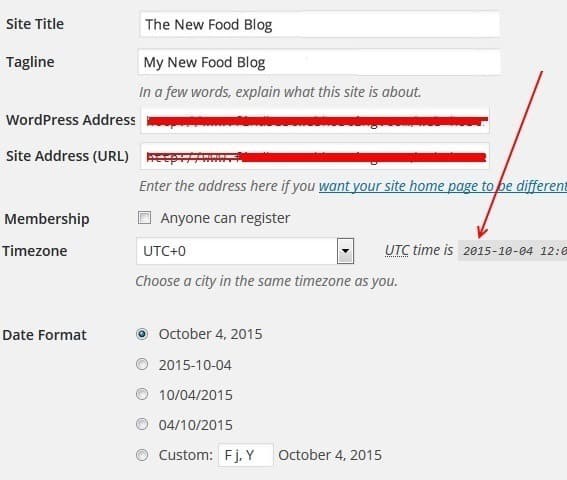
Your website title and tagline are what defines your website and its content. And your home page title is what people see first in the Google Search Results. So let us change your Site Title and Tag Line first. From your sidebar on left side, go to Settings >> General Edit your site title and tagline here.
- Modify the Time Zone –
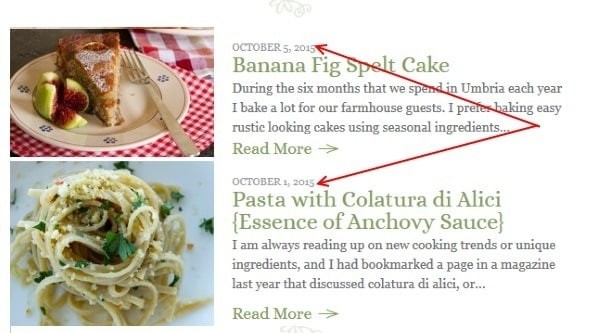
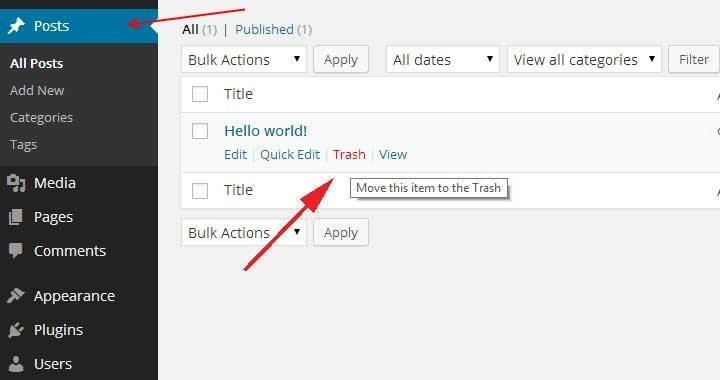
Date and Time are displayed to visitor to indicate when particular post was published. Change Timezone to the either a city that is in the same time zone as your city or in UTC format with appropriate offset.To do so, Scroll down the above General Settings page(Settings >> General), you will see fields to edit time zone. - Delete default post and pages in WordPress. – click on “Posts” tab (in left menu). A new window open (as shown below) with all posts. Mouse over the post.(in this fig. post name Hello World”). You will see some links below now. click on “Trash”.
Step 4: Install WordPress Themes and Plugins
What is a WordPress theme?
By now your blog is starting to take shape. However, when you go into the home page of your site, it looks bland, boring, and uninviting. The good news is that, thanks to WordPress, you can change the look or design of your blog in just a few clicks using a WordPress Theme.
In simple words, a theme is a template or design for your bog. It will make your blog attractive, easy on the eyes and makes your blog easy to navigate.
Before you start picking themes, remember that it has to remind your visitor that they are visiting a site that uniquely identifies your blog and style. It should be easy to navigate and is easy for visitors to get in and out of the site easily.
Good news is, WordPress offers lots of free food/recipe blog themes for you to get started. You can choose one that matches your style.
Premium Themes: You can also buy Premium themes that will be more stylish. Adding a premium theme is also easy and we have another article that covers premium themes. But let us not do that now. Let us focus on getting you started so that you get used to wordpress and become confident.
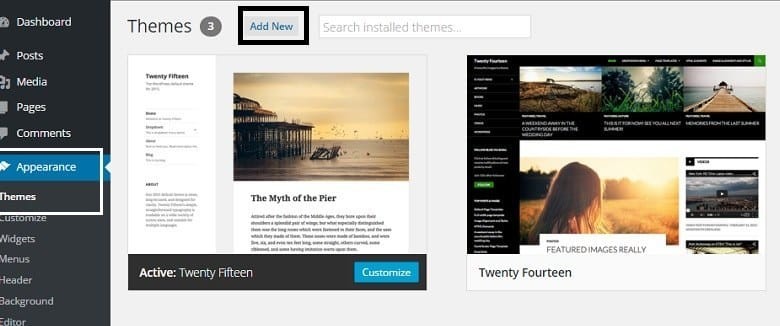
Select and Install a FREE Food theme – Mace Theme
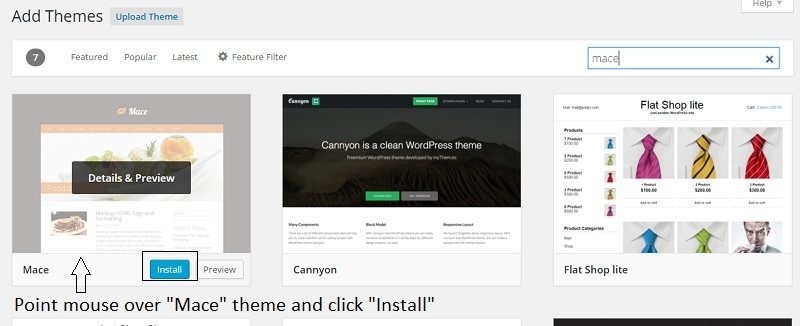
In the search box, enter “Mace” to locate “Mace” theme.
Now you can see the “mace” theme. Point your mouse over “mace” theme and then click on “Install”
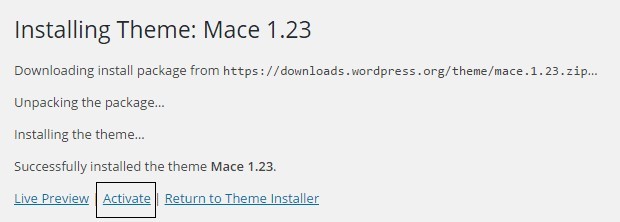
Now it will Install the mace theme. Now click on “Activate” button to complete theme installation process.
This completes your theme installation.
Now the last step. Add Plugins..You are almost done..Patience is the key…
-
Add “Recipe Card” plugin
Plugins add new features to your WordPress websites.
Plugins offer custom functions and features so that each user can tailor their blog to their specific needs. You can install plugins from your WordPress Admin Dashboard. As the word plugin indicates, you simply “plug-in” and you get that functionality added to your blog.
For example: Recipe Card Plugin lets you add recipes to your blog.
Let us start adding Recipe Card Plugin first. Later, we will add more plugins that are essential for your blog.
How to install Recipe Card Plugin
You can install WordPress plugins from your WordPress Admin Dashboard. In this step, we are installing Recipe Card Plugin
- From your sidebar on left side, go to Plugins > Add New

- In this page you can see a list of featured/popular plugins available in wordpress plugin directory. Locate search box, enter the name of the plugin , Recipe Card, into the search field and perform the search.
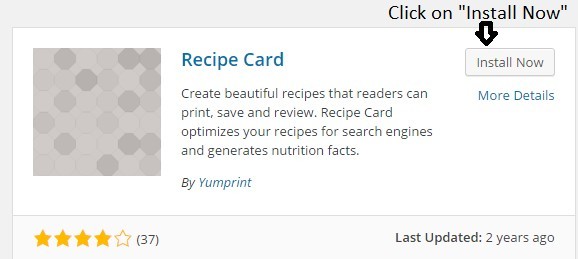
Enter “Recipe Card” and press enter - Select your plugin from the search results and click on Install button.
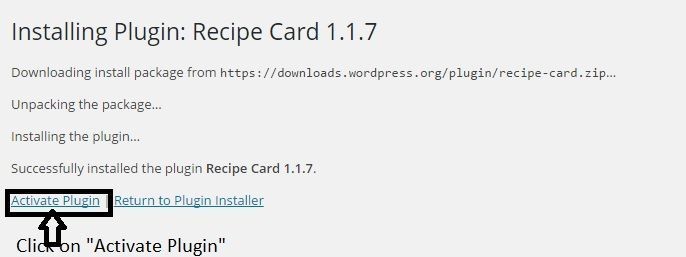
Click on “Install Now” - Wait for a while to download and install the plugin onto your blog.In the next step click on activate plugin.
Activate Plugin - Now you are done adding your Recipe Card plugin.
Now What?
Once you finish with the steps above, now’s the time to start writing! Before rushing off to write a post, let’s be familiar with categories and tags.
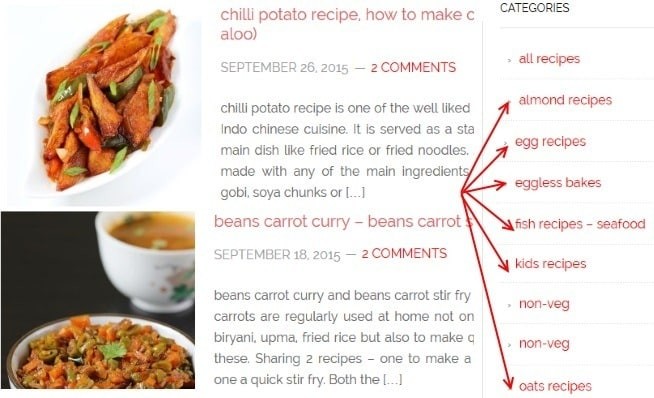
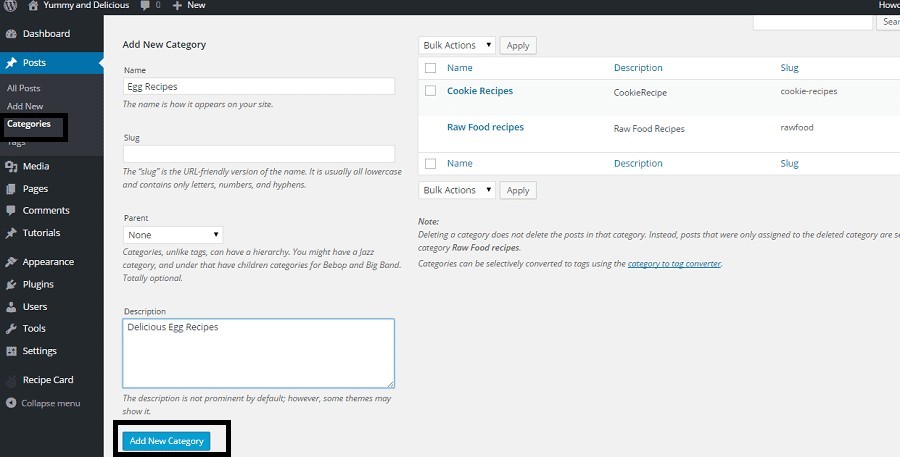
In wordpress, Posts are usually stored in Categories and/or Tags so you can keep related topics together. Categories provide a proper site structure and let you organize your content. You can add a new category by visiting Posts » Categories »add your new category or in WordPress when writing a post .
Let us add your first recipe
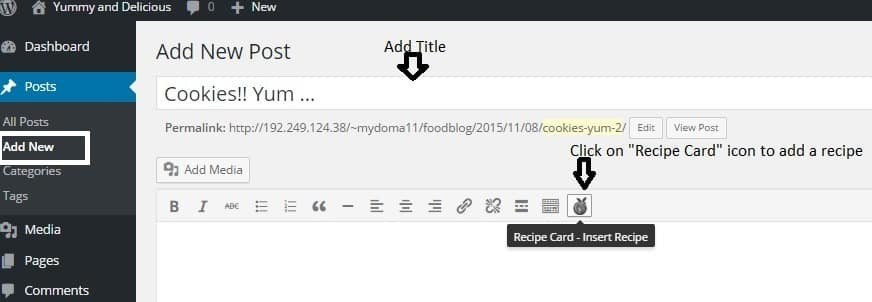
From your sidebar on left side, go to Posts > Add New.
Now you can see Add New Post screen
Now click on the “Recipe Card” icon to add a new recipe
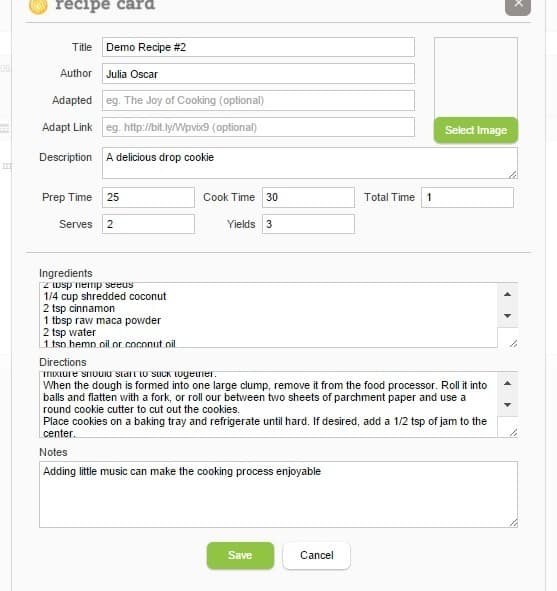
Now you can enter your recipe details and click on Save. All Fields are self explanatory.
Don’t forget to add a nice image.
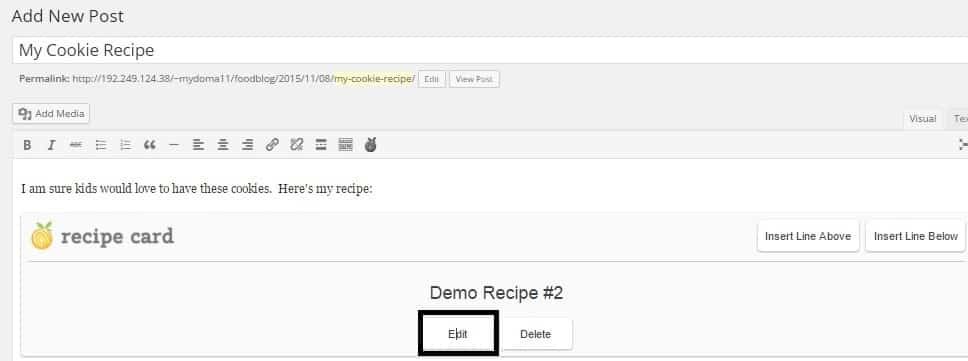
Even if you made a mistake, you can always come back and change it again. I will show you how in next screen.
After saving, you should see followng screen. You can always click on “Edit” button to go back to your recipe and then make changes.
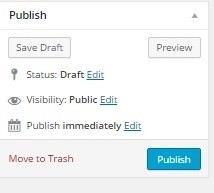
Now finally, click on “Publish” button(right top corner) to make your recipe live. (If you don’t want to go live now, then click on “Save Draft”. You can always come back and make it live by clicking on “Publish”)
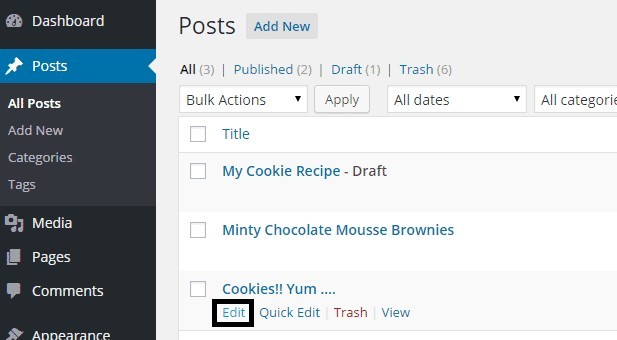
Done. Now, you can add a couple of more recipes like this. I came up with 3 posts total. You can always go back to any recipe post by moving your mouse over that post and clicking “Edit” button. It is very easy.
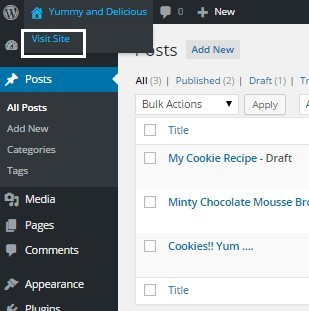
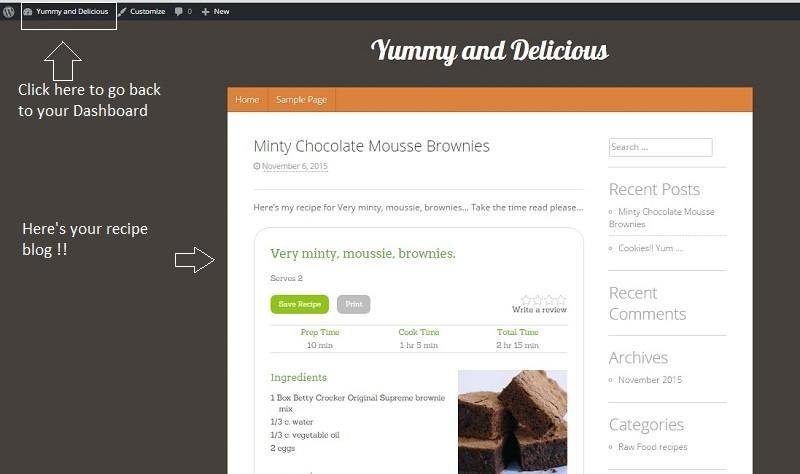
Now to view your blog, click on the blog title on left corner and you can view how your blog looks like now.
Here’s your blog with recipes.
Style your recipe card
Now you have some good options how to “style” your recipe card. Let us see how you can do that. It’s fun to play with.
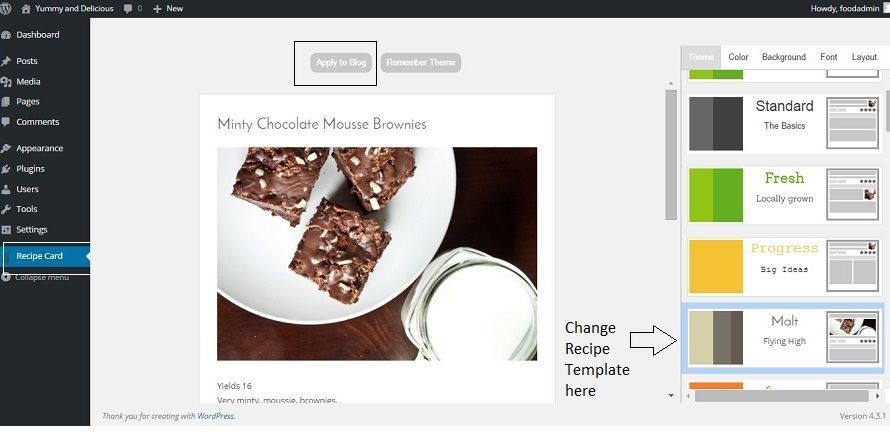
From your Dashboard, click on “Recipe Card” (left bottom ). You can change the “Theme” of your recipe card to match your style, select colors etc. You can even change layout, show nutrition facts etc in a very elegant way.
Then finally you can click on “Apply to Blog” button to save your changes. Once you save it, your recipe cards in your live blog will reflect this.
Couple of more important plugins to install – Do not skip this step
Once you get used to your blog and creating recipe cards, it is now time to install couple of more plugins that are important to your blog security and success. All these plugins are free(Some of them have advanced paid options as well. But we don’t need it)
In step 4, we learned how to install “Recipe Card” plugin. Follow same method to install following important plugins.
Please dont skip this step.
- Contextual Related Posts – Display a set of related articles at the end of each post. This keeps readers engaged who will read more articles from your blog. Increase reader retention.
- WP Smush – Reduce image file sizes and thus load your blog posts faster.
- Google XML Sitemaps – This plugin will generate a special XML sitemap which will help search engines like Google, Yahoo, Bing and Ask.com find your blog posts faster so that they are added to search results.
- iThemes Security – Protect your WordPress site by hiding vital areas of your site, protecting access to important files, preventing brute-force login attempts, detecting attack attempts and more.
- SumoMe – This multi-function plugin adds a social “Share bar”, a contact form, email subscriber form to your website with minimal steps. Here’s a useful and easy installation guide for SumoMe.
Sumome needs some simple setup steps which are quite easy to follow.
iThemes Security also has some small steps to follow. Complete these steps as well.
Change My DNS
This information is for only those who had already purchased a domain outside webhostinghub (i.e. you did not claim the free domain name at the time of sign up process ).
To get their domain working, you will need to point your domain to hub’s server. In other words after registering your domain, you need to set up NameServer from your hosting company to activate your domain name. The name servers values will be in the welcome email you got from your hosting account.
Log into your domain name registrar, look for some option to set your domain’s name servers and enter the details . Read >>How Do I Change My DNS or Name Servers?
Tips for Food bloggers
Understand SEO
SEO or Search Engine Optimization is the key to get your blog post noticed. There are plenty of tutorials online that will help you understand SEO, but the basics are pretty simple. In a nutshell:
Keywords are essential to SEO. Think about a word or phrase that people will be using when looking for your site – that is your keyword. Remember to choose the ones with the highest traffic, but add long tail keywords as well.
Use keywords naturally. In fact, don’t think about it often. Just write what goes naturally.
Check if the content is worth reading. Google checks for content quality now, and if there are typos in your post, there is a high chance it will rank lower in SEO.
Reach Out To Social Media
Social media networks like Facebook and Twitter is where most people hang out. On social media sites, you’ll find it easier to look for people who will be interested in your niche and your posts can be targeted easily as well. So, if you are thinking of spending a few dollars on advertising, try to reach out to social media first.
Know Your Voice
While there aren’t any rules about how to write a blog, it is best that you understand your voice, so that you’ll have a consistent identity across your reader. The best food blogs have a style that can be easily recognized by their readers. Your own voice connects with your readers and build a community around your blog. Your own voice, your own style, and writing in your own way is just one of the many things that your readers will keep coming back for more.
Be original
Copying someone’s work isn’t blogging – it’s called plagiarism. Make sure that your posts are original and came from your own word. If you have to share someone else’s work, ensure to take give them credits. After all, a duplicated content is a sign of a low quality blog so people will avoid it like a plague.
If you’ve been writing for a while, then you might have already established your own voice. For those who have just started, it will take a while to know your voice, but be very patient as this will develop in time.
Be Professional
Your food blog should be focused on your food blog alone and leave other topics to another blog post. If you are criticized, answer in a professional manner and don’t curse. Cursing will make you look like you can’t handle one criticism; thus will destroy your credibility.
You have completed basic level. Now what?
This completes your basic level. You see, starting a food blog isn’t hard. All you need is the right mindset, the passion, and basic knowledge in blogging to start one. Now that you have all of these at hand, why don’t you start making your food blog today.
It doesn’t matter if you won’t have visitors in the first few weeks because as long as you are consistent with your posts, have developed your own voice, and you enjoy what you do, you’ll get visitors in no time.
With constant effort and of course, with great recipes, you can become a top blogger.
Article by: Tom George, WordPress Blog Expert. Also Chief Editor of findbestwebhosting.com
